
A Comprehensive Checklist For Site Measurement
When doing site measurements, use this checklist

Chiranjeevi
Senior manager - Design
A Comprehensive Checklist For Site Measurement

How many times have you sat down to design a kitchen only to discover that the plumbing points were not mapped?
When was the last time you discovered that your wardrobe overlapped an electrical switch point during installation?
When it comes to planning an interior space, accurate and precise site measurements are absolutely essential. To make sure you don't miss any important details during the measurement process, there are a couple of options available. The most common one is hiring an expert technician but that it's not always feasible.
In such cases, equipping yourself with the right instruments and being systematic about it works, although it is a lengthy process. This is where a checklist comes in. This checklist helps ensure that you consider all factors while taking measurements. By following a checklist, you can cover all your bases and avoid any oversights or mistakes that might affect your design or planning.
Remember, taking the time to carefully measure the space and consider all the relevant factors is absolutely vital. So, let's explore some key considerations to keep in mind while conducting measurements.
Tools you will need
- Notebook or white paper with writing pad
- Pencil/pen
- Eraser
- Measuring tape/laser measure
- Compass
- Calculator
The Process
Floor Plan
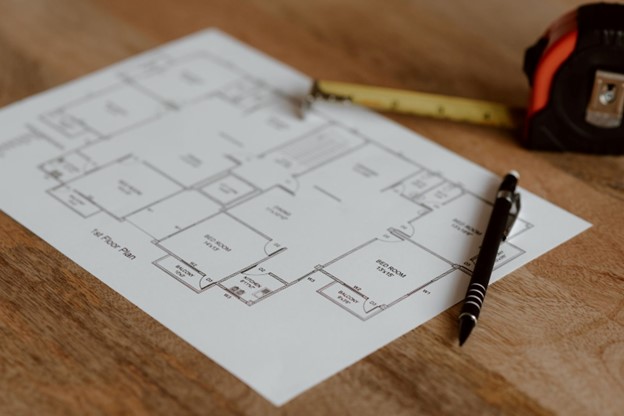
When starting a design project, we usually rely on the existing floor plan as a starting point. However, it's common for room dimensions to change in most situations. That's why it's crucial to create a floor plan that suits the specific circumstances of the site. This ensures that we accurately position the furniture and create a layout that works harmoniously with the space.
Apart from adjusting the floor plan, it's important to label the walls of each room. This simple step helps prevent any confusion or misunderstandings when sharing information between team members or communicating with clients.
Clear labels make it easier to refer to specific walls and ensure everyone is on the same page when discussing design ideas or modifications. By considering these factors and taking the time to adjust the floor plan and label the walls, we can create a design that not only meets the needs of the space but also facilitates effective communication throughout the project.
Walls, Beams and Columns

When measuring the room, it's best to start at the entryway and proceed systematically, working your way around. Take careful note of various elements such as the width of the walls, doors, and windows. It's important to also measure the width and depth of any columns present in the space.
Always pay attention to the height of the window sill and the dimensions of half walls, considering both their height and breadth. To ensure precise measurements, take the floor-to-ceiling height at multiple locations along the wall. This will give you an accurate understanding of the highest and lowest points within the space.
If there are any beams in the room, be sure to measure the distance from the floor to the bottom of the beam. Remember to also take note of the beam's depth and height. These measurements are crucial for creating an accurate representation of the room and accommodating any design considerations related to the beams.
By following these measurement guidelines, you'll gather all the necessary details to create a comprehensive and precise layout of the room.
Doors and Windows

Let's take a moment to think about a scenario where you have a bedroom door that stands at seven feet high, followed by a closet door that reaches eight feet high. Alternatively, imagine a kitchen window that extends to 2400mm above the finished floor level (FFL), with a kitchen loft starting at 2040mm from FFL.

It's important to address these measurements accurately because miscalculations can lead to design mistakes that can be both time-consuming and costly, especially in the kitchen area.
By ensuring precise measurements of the door and window locations, as well as their respective heights, we can effectively avoid these errors. Taking the time to measure these elements correctly will save you valuable time, energy, and money in your kitchen design project.
Concrete Skirting and Kitchen Countertops

In some cases, you may get projects where concrete skirting is present or a kitchen countertop is secured using MS Angles or even a brick wall. Ideally, we would suggest removing these elements and repairing them after the cabinet installation. However, in reality, we often have to work with existing structures and find alternative solutions.
When faced with this situation, it's important to take repeated measurements of the depth of the concrete skirting and the dimensions of any brick pillars. Pay careful attention to measuring the distance between two pillars and the height from the concrete skirting (or completed floor level) to the bottom of the countertop at multiple depths. These measurements are crucial to ensure that the cabinets fit precisely in terms of width and height.
If the countertop is secured using MS Pipe or angles, take note of the angle's location and measure its thickness, height, width, and depth. This information is vital to ensure that the angles do not obstruct the installation or functionality of the cabinets.
While we may not have the luxury of a perfect world, by taking accurate measurements and considering these details, we can overcome challenges and find suitable solutions for incorporating cabinets into the existing setup.
Lofts
When it comes to lofts, we sometimes find spaces where there is no concrete loft base. In such cases, it's sufficient to measure the floor-to-ceiling heights at multiple locations and note down the dimensions of any beams present. However, if there is a concrete base for the loft, we need to take additional measurements to ensure a proper fit.
For concrete loft bases, it's important to capture the height, depth, thickness, and height of the base from the floor in multiple locations. Additionally, measure the distance from the loft base to the ceiling. These measurements will ensure that the loft fits perfectly within the given space and aligns with the overall design.
When considering the loft, don't forget to take note of the positions of fans and light points in the ceiling. This will help us avoid any collision issues between the opening of the loft shutters and these fixtures. By capturing the necessary details, we can create a functional and aesthetically pleasing design that enhances the overall ambiance of the room.
Electrical and Plumbing
In an ideal scenario, the interior designer would be involved from the beginning to determine the optimal locations for electrical and plumbing points, taking into account the flow and functionality of the room. However, it's unfortunate that in many cases, interior designers are involved only after the construction work is completed. Despite this, it remains crucial to carefully consider the placement of these points to avoid any conflicts with the design and to make necessary corrections.
When assessing the location of electrical points, pay attention not only to the switchboard's placement but also to the controls provided on the board. This ensures that the switches and controls are conveniently accessible and aligned with the design aesthetics.
Similarly, for plumbing points, consider whether it involves a hot or cold water line or a water outlet. Note their positions and ensure they are in harmony with the overall design and functional requirements of the space.
By taking these factors into consideration, we can identify any potential clashes between the design and the existing electrical or plumbing points, allowing us to make the necessary adjustments for a great design. While it may require some modifications, collaborating with an experienced interior designer can help in finding practical solutions to optimize the space and enhance its overall appeal.
Tiles, Tiles and More Tiles

In certain projects, it's not uncommon to encounter situations where the kitchen's wall tiles have already been installed. The tile placement may vary, ranging from just two feet above the granite countertop to floor-to-ceiling tiling or tiling up to the window or door level.
It's important to take precise measurements of the tiles, including the dimensions of individual tiles and the total number of tiles in a row or column. This information becomes particularly useful when tiling up to the window or door level, as it helps determine where your wall cabinets should end and your loft should begin. Connecting wall cabinets directly to the tile's edge can potentially result in chipping or other aesthetic issues.
Also, measuring the individual tiles and keeping track of their count can assist in approximating the location of any missing utility points that might have been overlooked during the initial measurements. The same principle applies to floor tiles, where accurate measurements aid in planning the layout and positioning of various elements.
Also, taking measurements of the height and depth of the skirting tile can play a significant role in designing the depth of your cabinets' side or visible panels. This ensures that the cabinets align well with the existing skirting, creating a cohesive and polished look.
Site Photographs
“A Picture Speaks a Thousand Words” – Fred R Barnard
Taking site images not only helps you recall concerns and challenges on-site, but when combined with individual floor and wall tile measurements, you may estimate the location of a missing electrical or plumbing point. When photographing a room, ensure that the orientation is a portrait and that all walls are shot.
Present and Future
In today's world, as we increasingly depend on technology to overcome the flaws of any manual procedure, there are devices available on the market that may assist you in precisely recording all site measurement parameters. There are tools available from Bosch, Freemans, and Leica, among others, that may assist you in saving time and obtaining more precise measurements.
Accurate site measurement serves as the foundation for a truly remarkable design. It not only saves valuable time and money but also ensures that your customers are delighted and satisfied with the end result.
We have made a helpful checklist for site measurements to make this process smoother. This checklist can serve as a starting point, enabling you to create your own personalized checklist tailored to the unique requirements of your project.
Remember, accurate site measurement is the key to transforming your vision into reality. So do it carefully, knowing that your meticulous approach will result in a design that leaves your client speechless.
Happy measuring!
Ready to automate your interior design & manufacturing?
See how Prolance cuts project estimation time to minutes and generates zero-error CNC machine files directly from SketchUp.